Tuesday, April 9, 2013

DIY Sunburst Mirror

Oooops, if any of you entered in to check out this post a little while ago and wondered why I had not written any introduction to the post, I'm sorry, my bad !! The only thing I can think of is that I haven't had my cuppa tea yet and I guess it made me distracted, so I hit the post button before completing the post :-(

Anyway on to the post, I love sunburst mirrors but every time I see one in the stores or consider buying one, I keep thinking I can make something like this easily and will probably feel far more satisfied when I am done with it and hang it up on the wall than the store bought thing. Recently when I was in the craft store and came across some charger plates on sale, it struck me that these would probably serve well in creating a sunburst mirror and it did :) This was an incredibly quick project, the only things that slowed me down was the drying time for the skewers, mainly because we have had lot of rains recently and the high humidity caused slower drying times. Other than that, this was truly easy peasy and quick, perfect weekend project:)

 photo b272b4b8-cade-4055-8c44-707741405ecc_zpsaa28392b.jpg

And here is the second mirror I made on similar lines, only made it a bit more decorative than the first one...

BC- DIY Sunburst mirror photo df25f1df-cf72-474b-9bdc-c177039e6db0_zps28adfc5c.jpg

Things you will need to make this mirror.....

A charger plate
a round mirror that will fit in the center of the charger plate ( I used a 7.5 inch mirror )
1 small plywood circle ( I used a plywood circle of 6.5 inches)
1 pack of bamboo skewers (or dowels, chopsticks or straws)
0 .5 inch small round mirrors as needed
1 inch round mirrors as needed
flat back pearl beads as needed to stick around the mirror
paint in the color of choice, I used rustoleum paint in kona brown glossy because that color matched my charger plate.
something that can be attached to the back of the plywood circle to hang the mirror (I used a thick cord)
glue gun/ any kind of glue that will work with plastic/wood.


Attach the mirror to the charger. I used a 7.5 inch mirror, and the depth in my charger plate was 8.5 inches. I wanted that little extra space so that I could glue on some flat back pearl beads around the mirror. If you do not plan to do any decoration around the mirror, you can use the exact size that would fit right in the center of the charger plate.  For the second one, I attached some rhinestones and small mirrors all around the charger plate to make it more decorative.


Mark the placement positions of bamboo skewers on the plywood circle and either glue it and then spray paint the skewers or spray paint the skewers then glue to the plywood circle. For the first mirror I spray painted the skewers first, but found it gets a little tricky in that the skewers move a lot while spraying so it is a bit more difficult to get even color. For the second one, I glued the skewers to the plywood circle first then sprayed the whole thing.


Make a loop and attach the cord to the back of the plywood circle. Then attach the charger with mirror on top of the plywood + skewer arrangement. For this , I applied hot glue to the back of the charger plate and placed it on the plywood + skewers and pressed gently until it stuck to each other. Finally glue the small and large mirrors in a random placement on the skewers.

Allow it to dry. Enjoy your handiwork :)
Read more ...

Wednesday, March 6, 2013

DIY Faux Mosaic Frames made with recycled cds

You know how over time you accumulate a stack of unusable cds/ dvds that are just lying around gathering dust? I had a stack of such cds in one of my closets that I was hoping to put to good use one day. I always thought I would probably make a few crochet coasters with them when I had the time. Recently when I was surfing the net, I came across an article that mentioned one of the methods of disposing off cds was to cut them up. 

Up until that moment I never thought of  cutting cds at all, but they cut real easy :)  Once I had a few pieces in my hand, I was thinking up all the ways I would be able to use these pieces. Since I had a couple of unfinished wood frames my first project with these cds was to use them up to give the frames a "faux mosaic look".  I made a couple of frames and used up about 4 to 5 cds totally for the project. Here is a picture of one of the frames........................


Faux Mosaic Frame with recycled cds photo 871ed448-6509-482c-89a7-d72a3ddf6736_zps82910f32.jpg

Things you will need...........
An unfinished frame
2 to 3 old cds that you want to discard
Scissors to cut the cds into small pieces
glue gun / Or any other glue to stick the cd pieces to the frame
Acrylic paint in color of choice

Cut the cds into small pieces in whatever shape you prefer, either small squares or small triangles. I needed about a couple of cds per frame. I noticed that sometimes if the pieces were cut too small, the lower side and the upper side of the cds kind of separated, so I kept the size of the pieces reasonably small not too small.


Place on the frame to make sure you have enough pieces

Paint the frame in color of choice. I painted it white to go with the decor in a room I wanted to use this frame in....I also thought since the cds seemed to have a slightly purple hue the white would provide a good contrast.

Once the paint is dry stick the pieces of the cd on the frame one by one.

Let dry , stick a picture in the frame and enjoy :)
Read more ...

Monday, March 4, 2013

Orange Mother of Pearl square bead earrings

Been a long while since I posted any earrings in this space. Mostly because I haven't been making very many pieces of jewelry these days. All my free time seems consumed by some or the other home decor projects. Until I get to my next jewelry project I will try and share some of the pictures of a few earrings I made a little while back. Here is one of them.....


Orange mother of pearl earrings photo 119ffc53-2711-410a-a8d3-b5dc885c28a1_zps86954773.jpg

These simple earrings are made with square mother of pearl beads that I purchased recently on a trip. They are casual earrings and would be ideal to dress up a simple top or a t shirt :)

Read more ...

Wednesday, February 20, 2013

DIY Beaded Mirror with tutorial

Okay I know some of you may be wondering if this space is now going to be exclusively devoted to diy mirrors. No it isn't , it's just that I have finally gotten around to making some of the mirrors that I had been planning for a while now and coincidentally it seems that I ended up making almost all the mirrors around the same time. I promise to go back to more jewelry from my next post, in the meanwhile take a look at a new mirror that adds a touch of bling to one of our walls now.

 photo 2a6e87c1-109b-44c2-811f-3ce2c25476b3_zps1751e055.jpg

This mirror is made with beads, and rhinestones.It was a very simple and quick project and once I had assembled all the materials I needed for it, didn't take very long to complete. The completed mirrors are not very large, they are ideal for a very small bare wall that needs a little something to dress it up. I made a couple of these and also one slightly larger mirror that I made entirely with beads. Check the picture of the other mirror at the bottom of this post and do let me know what you think about both the mirrors........

  photo 0df6c523-b70e-413d-bc4d-ee3276ae5dfc_zps593c3b5f.jpg

Things you will need.....
5 inch round mirror
6 1/2 inch round plywood
1 string of beads of color of choice (I used a string of 4X6mm chocolate brown beads)
7 mm rhinestones of color of choice (I used light blue)
12 mm rhinestones color of choice(I used clear rhinestones)
Nylon thread to string the beads ( I use .25 mm fishing line that I got from the sports store that I use for beading sometimes)
Acrylic color of choice ( I used Martha Stewart's multi surface metallic rose copper paint that I had leftover from an earlier project)
Some thick or strong string (  like jute string) a few inches long to create a loop at the back to hang the mirror

Glue gun/ or other glue to stick beads and rhinestones
a pencil 

Method :
Paint the plywood with the color of your choice. After it dries place the mirror in the center and mark a circle around it. This is not necessary, but I do this so that once I have hot glue on the back of the mirror I know the position for it, otherwise it might get stuck in a slightly odd position. Apply hot glue/ glue to the back of the mirror and stick it to the wooden circle.

String the beads together and place around the mirror to make sure you have the desired length. Loop the ends of the thread through the beads that are joining a couple of times to make sure it holds. Apply glue to the wood and stick the beads to the wood. Allow to dry.

Stick a row of 7 mm rhinestones. Then stick a row of  12 mm rhinestones. When dry form a loop with the thick string and attach it to the back of the wood with some glue. When dry hang wherever you want and enjoy :)

I used the same idea to create another mirror, this one does not have any rhinestones, only beads. Instead of one string of beads followed by rhinestones, in this mirror I just used 3 strings of beads. I have painted the wood a metallic golden color, and I left a small bit of wood showing because I did not want too many beads around the mirror, thought it would look too busy. I have hung this mirror in a room that has some green and brown tones so this kind of pulls both these colors together.

 Beaded Mirror-BC-2 photo 83ec6725-0c3e-4460-8e3b-55859e0f9d4c_zpsfe89d082.jpg

This DIY Mirror is off to the following events...
The Winthrop chronicles link it party
We did it Wednesday

Read more ...

Monday, February 4, 2013

DIY Sunburst Mirror with step by step tutorial

Ever since I attempted making this chrysanthemum mirror    I have been itching to try making more mirrors for our home. I came across an idea on pinterest that used the rolls from bath tissue as a flower mirror. Since I already had a flower mirror I thought of trying a sunburst mirror with the same concept. I have been saving all my kitchen tissue rolls for another project for a while now. I also had some jute rope left over from a previous project and a round cardboard that was part of some packaging that I had saved hoping to use it in some craft. Since I had all the items on hand, this project was very quick and easy. In my estimation it did not take more than a couple of hours to put together and this is how it looks..............

DIY Sunburst mirror


Things you will need...

an 8 inch round mirror
9 1/2 inch cardboard circle
kitchen tissue roll as needed cut into 1/2 inch "petals"
Jute rope as needed (I used 1/4 " thickness rope)
glue gun
spray paint in your color of choice

Method
First cut the kitchen tissue rolls into equal sized "petals".

Then place everything together to check out if you have everything that you need and to check arrangement and see if you need to cut some more rolls.


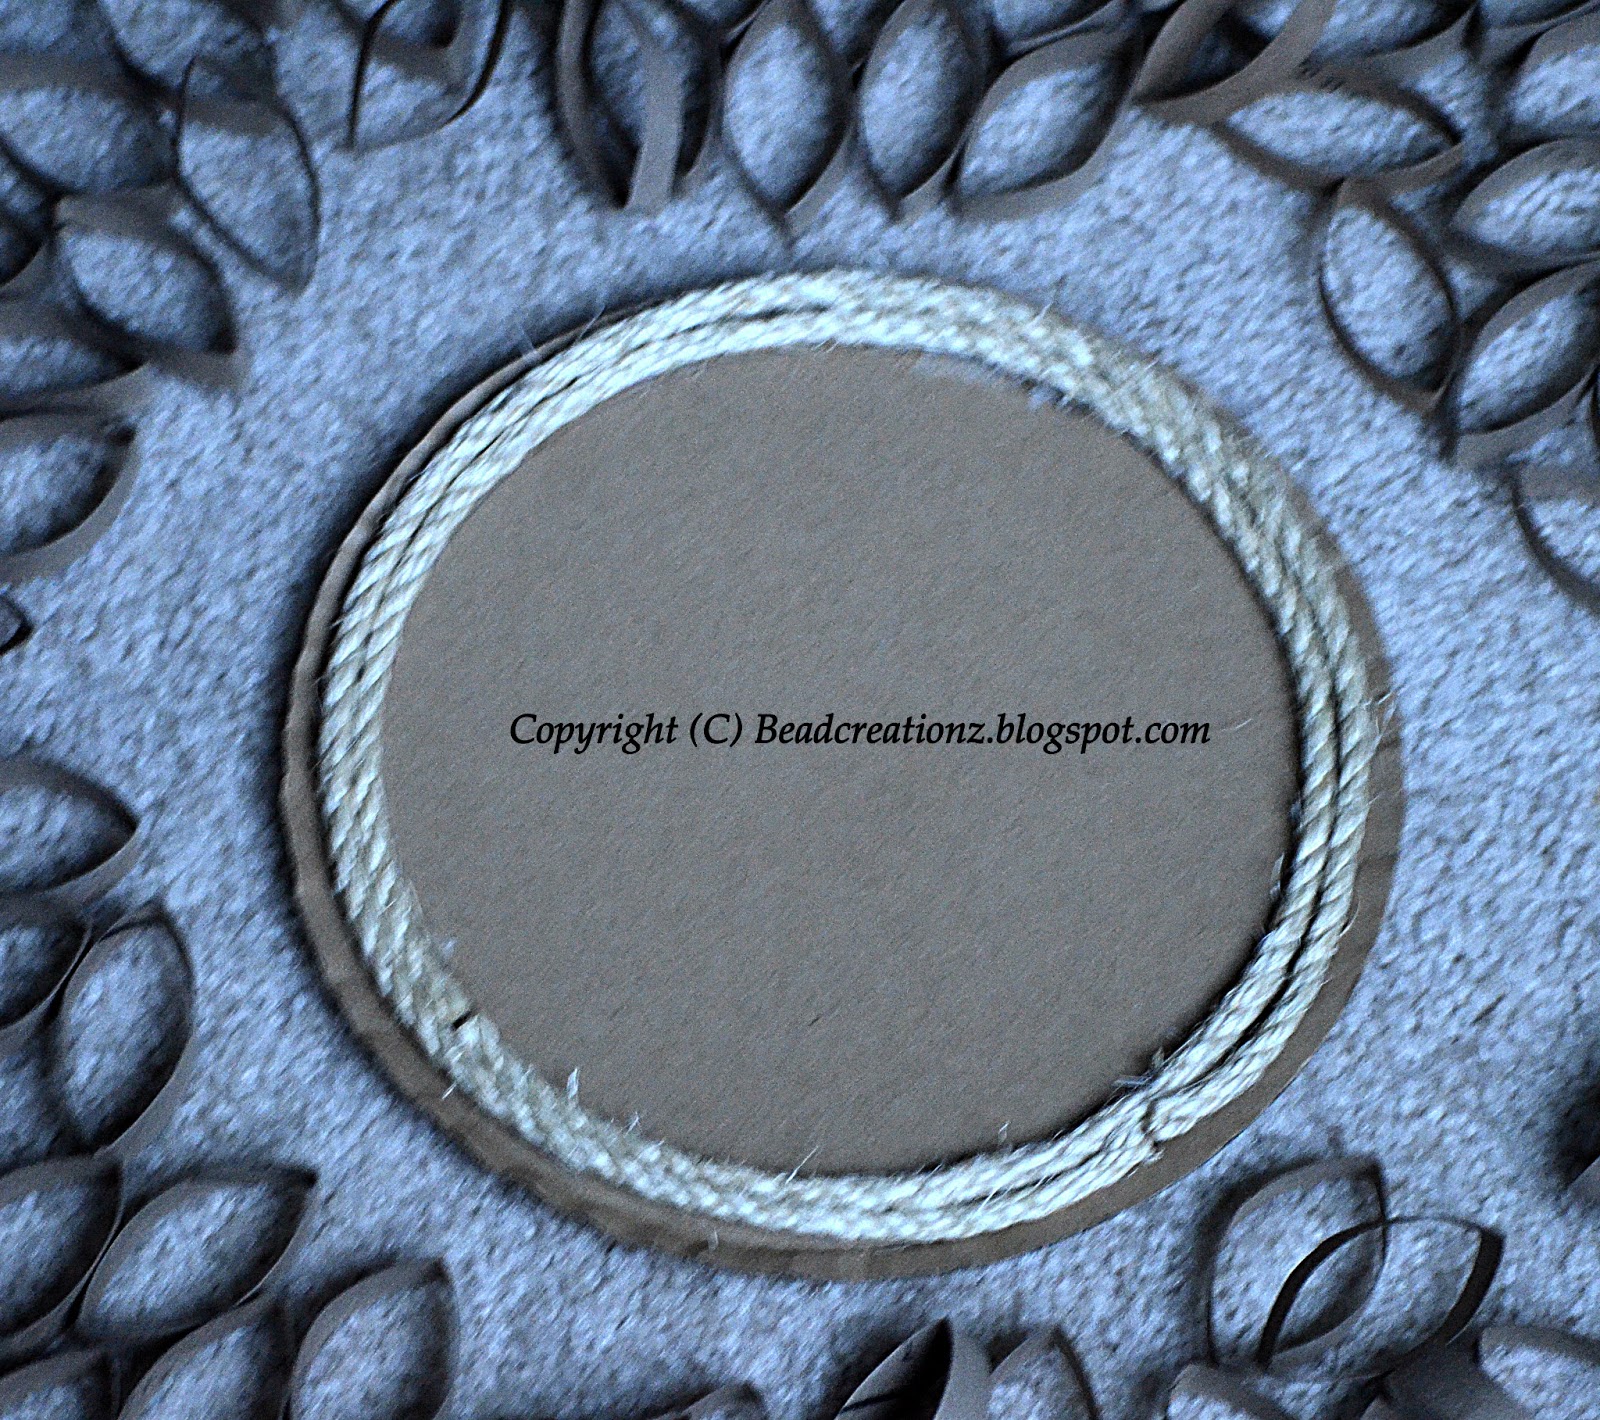
Next draw a circle around the circumference of the mirror to mark its place with a light pencil. Place rope around the drawn circle and cut. Glue the rope to the cardboard


Once the rope is glued all the way to form a "frame" for the mirror. Start sticking the petals to the cardboard.


Stick the second row of petals to the first row. I used a little glue on the sides to in the second row so that the petals retain their shape.

Glue a little bit or rope or a lighter jute thread at the back of the cardboard to help in hanging the piece

When done, spray paint the entire frame + petals in desired color. Finally stick the mirror in the center. Allow to dry.

 Sunburst Mirror DIY

Hang and enjoy :)

Read more ...

Monday, January 28, 2013

Wood bead Earrings

Recently I purchased some wood beads for the first time and was very keen to try them in earrings and necklaces, but first in earrings. Since the beads were red, I decided to pair them with silver spacers for a good contrast and made it in a very simple pattern. This is how it turned out..... :)

 Wood Beads Earring
Read more ...

Monday, January 21, 2013

Metallic rondelle earrings

In the past I have used a metallic beads a few times in combination with other spacers or beads in earrings. This is the first time I used all metallic rondelle crystal beads in earrings, I just used different colors and sizes and used some daisy spacers in between to add a little more interest. These earrings aren't very long, they turned out to be quite small small and dainty :)

Metallic rondelle earrings
Read more ...

Monday, January 14, 2013

Peach silver earrings

Made a few earrings recently and will share their pictures here soon. Here is the first one, made this one for a friend. It's a simple design with silver spacers and a peach colored acrylic bead.  I thought the spacer made a big difference, it really added a nice touch to this earring. It's a very light and delicate earring, making it a perfect accessory for any simple top or tshirt:)


Peachsilverearrings resized

Read more ...
Related Posts Plugin for WordPress, Blogger...